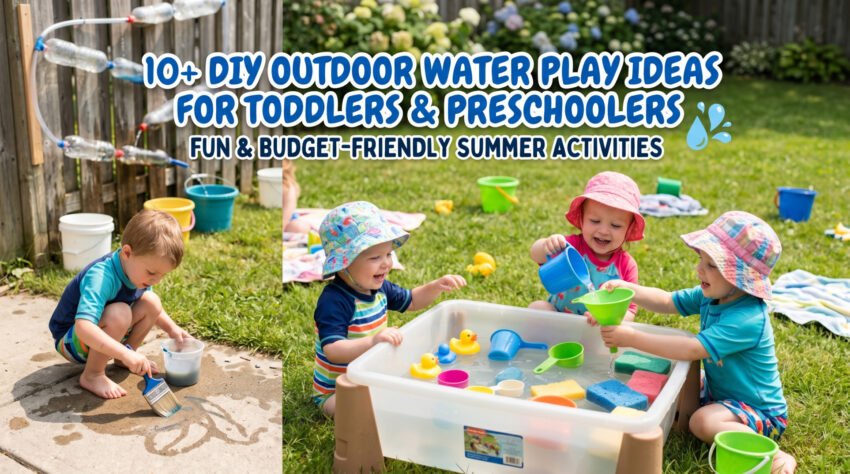
If your children are drawn to water the moment the weather turns warm, you are certainly not alone. For many families, the arrival of spring and summer means one thing: water play, and lots of it. Whether the temperature is soaring into the high nineties or it is just a mild, sunny afternoon, young children constantly seek out the sensory thrill of splashing and playing with water.
The good news for parents and caregivers is that water play is one of the most engaging, enriching, and time-consuming activities you can provide for young children. It keeps them cool, burns off excess energy, and keeps them happily occupied for far longer than most indoor toys. More importantly, you do not need access to an expensive water park, a public pool, or even a massive backyard to make water play a reality.
With a little creativity and some common household items, you can transform a small patio, a patch of grass, or a modest yard into an exciting aquatic playground. This comprehensive guide details nine of the best do-it-yourself outdoor water play ideas specifically curated for children under the age of six. Not only are these activities incredibly fun, but they are also deeply educational. Engaging with water helps toddlers and preschoolers develop fine and gross motor skills, hand-eye coordination, basic scientific reasoning, and imaginative creativity.
Let us dive into these fantastic, easy-to-set-up outdoor water play ideas that will keep your little ones entertained all season long.
1. Sponge Bombs
Water balloons are a traditional summer staple, but any parent knows the frustration they bring. They take a long time to fill, pop in seconds, and leave your yard littered with tiny, potentially dangerous pieces of plastic that take forever to clean up. Sponge bombs are the ultimate alternative. They are reusable, completely eco-friendly, soft on impact, and incredibly easy to create at home.
Materials Needed
-
Standard household sponges (preferably in assorted, bright colors)
-
Strong rubber bands or small plastic zip ties
-
A large bucket filled with water
-
Scissors
Step-by-Step Setup
To make your own sponge bombs, take three standard rectangular sponges and cut each one lengthwise into three or four equal strips. Gather about nine strips in your hand, mixing the colors for a vibrant look. Cinch the bundle tightly in the exact center using a strong rubber band or a zip tie. Once secured, fluff the pieces outward so they form a starburst or pom-pom shape. Drop them into a bucket of water, and they are ready to be thrown.
Developmental Benefits
This activity is fantastic for developing gross motor skills and hand-eye coordination as children practice aiming and throwing. Furthermore, the tactile sensation of a squishy, water-logged sponge provides excellent sensory input for toddlers. Because the sponges are soft, they are perfectly safe for younger children who are still learning to catch.
2. Ice Cube Rescue
The Ice Cube Rescue is a classic sensory activity that never fails to capture a preschooler’s attention. The premise is incredibly simple but highly engaging: children must act as “rescuers” to free their favorite miniature toys from blocks of solid ice. This activity is particularly refreshing on exceptionally hot days and requires great focus and patience.
Materials Needed
-
Ice cube trays, silicone muffin tins, or small plastic food storage containers
-
Miniature water-safe toys (plastic dinosaurs, building block figures, or small animal figurines)
-
Spray bottles, child-safe plastic tweezers, or small wooden mallets
-
Warm water and a small bowl of table salt
Step-by-Step Setup
The night before you plan to do this activity, place one small toy into each compartment of an ice cube tray or muffin tin. Fill the compartments to the brim with water and place them in the freezer overnight. The next day, pop the ice blocks out and scatter them in a large plastic bin or directly onto the grass. Hand your children spray bottles filled with warm water and let them go to work.
Developmental Benefits
This activity is a powerhouse for fine motor skill development. Squeezing the trigger of a spray bottle is one of the best ways to strengthen the small muscles in a child’s hands, which is crucial for future handwriting skills. Additionally, this serves as an excellent introduction to early science concepts. You can discuss the states of matter, observing how the solid ice melts back into liquid water depending on the temperature and the application of warm water or salt.
3. Backyard Car Wash
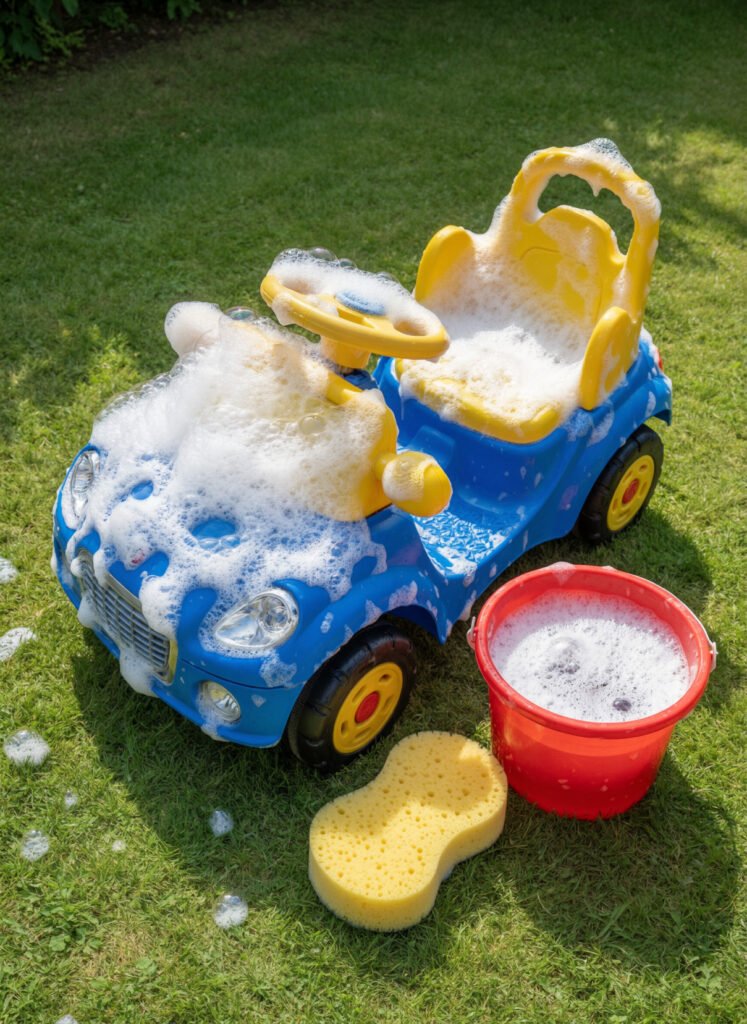
Children love imitating adult tasks, and setting up a backyard car wash allows them to engage in constructive, role-playing fun while getting thoroughly soaked. This activity scales perfectly depending on the size of your yard and the toys you have available, ranging from small toy cars to large, plastic ride-on vehicles and tricycles.
Materials Needed
-
A collection of water-safe vehicles (plastic trucks, tricycles, ride-on cars)
-
Two large buckets
-
Tear-free baby shampoo or mild dish soap
-
Large car-washing sponges, soft scrub brushes, and old drying towels
Step-by-Step Setup
Designate a specific area of your driveway or lawn as the official “Car Wash Zone.” Fill one large bucket with warm water and a generous squirt of tear-free soap to create a mountain of bubbles. Fill the second bucket with clean, fresh water for rinsing. Line up the vehicles and equip your children with sponges and brushes. Show them how to scrub the dirt off, rinse the vehicles with the clean water, and polish them dry with the towels.
Developmental Benefits
A backyard car wash is a wonderful way to teach children about responsibility and the care of their belongings. It requires gross motor exertion as they bend, scrub, and wipe down the surfaces. The abundance of soap bubbles also provides a rich sensory experience. If multiple children are playing, it naturally encourages teamwork, communication, and taking turns.
4. Rainbow Water Beads
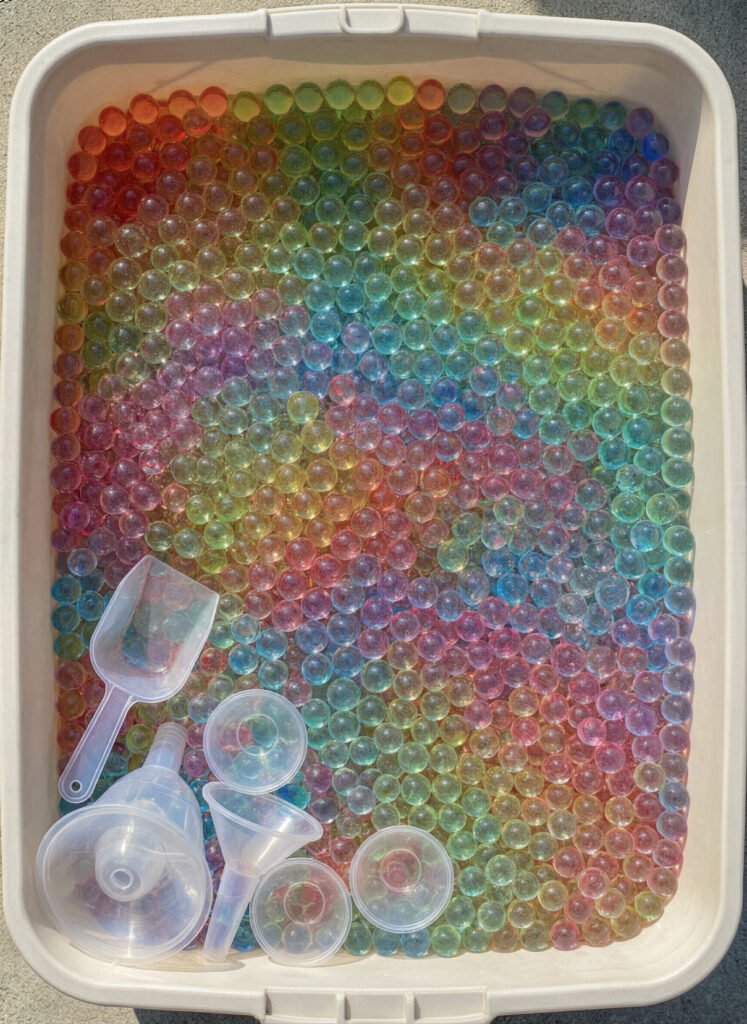
Water beads are practically magical to young children. Originally used in floral arrangements to retain moisture, these tiny, hard polymer pellets expand to hundreds of times their original size when soaked in water, transforming into squishy, slippery, brightly colored spheres. They offer an unparalleled tactile experience.
Materials Needed
-
Dehydrated water beads
-
A large, shallow plastic storage bin
-
Clean water
-
Sensory play tools (slotted spoons, measuring cups, plastic funnels, and small bowls)
Step-by-Step Setup
Place a small handful of dehydrated water beads into your large plastic bin and cover them with several inches of water. It is best to do this a few hours before playtime, as they take time to fully expand. Once they are plump and squishy, set the bin outside and provide your children with various tools to scoop, pour, and sort the beads.
Developmental Benefits
Water beads are the ultimate tool for sensory integration. The smooth, slippery texture is calming and highly engaging. You can easily incorporate academic skills into this play by asking your child to sort the beads by color into different bowls or by counting how many beads fit into a specific measuring cup.
Important Safety Note: Water beads must be used under strict adult supervision, especially with children under three, as they pose a choking hazard and can be dangerous if swallowed. Always ensure they are stored out of reach when not in active use.
5. DIY Water Wall
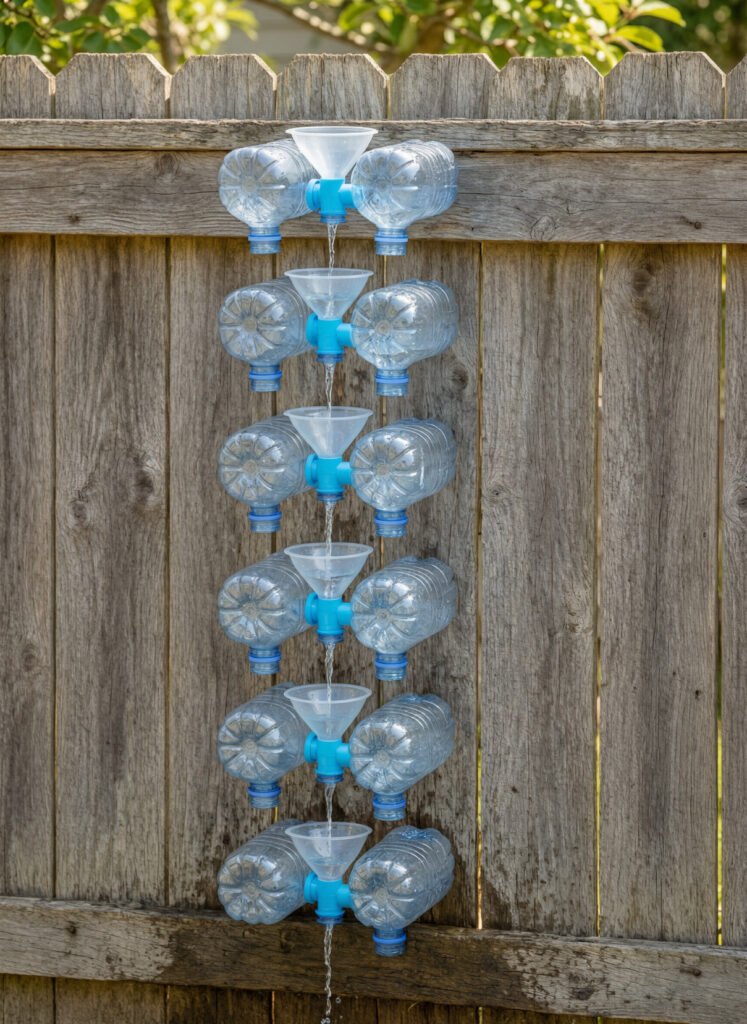
For a project that combines engineering, physics, and water play, a DIY water wall is an absolute winner. This vertical playground allows children to manipulate the flow of water, testing out different routes and watching gravity in action. It is highly customizable and can be built almost entirely out of materials pulled from your household recycling bin.
Materials Needed
-
A vertical surface (a chain-link fence, a wooden trellis, or a pegboard)
-
Recycled plastic items (water bottles, milk jugs, yogurt containers)
-
Plastic tubing or old pool noodles cut into halves
-
Zip ties, strong waterproof tape, or staple gun
-
A watering can or a bucket with a small pitcher
Step-by-Step Setup
Begin by gathering your recycled containers. Cut the bottoms off water bottles to create instant funnels, and poke holes in the bottoms of yogurt cups to create rain-shower effects. Attach these items to your vertical surface using zip ties or tape. Arrange them in a cascading pattern so that water poured into the top container will flow out and catch in the container directly beneath it.
Developmental Benefits
A DIY water wall is a phenomenal introduction to STEM (Science, Technology, Engineering, and Mathematics) principles. Children learn about gravity, volume, and kinetic energy. It requires deep problem-solving skills and critical thinking; if the water misses a funnel, the child must figure out how to adjust the angles and reposition the pieces to achieve the desired flow.
6. Slip-and-Slide Upgrade
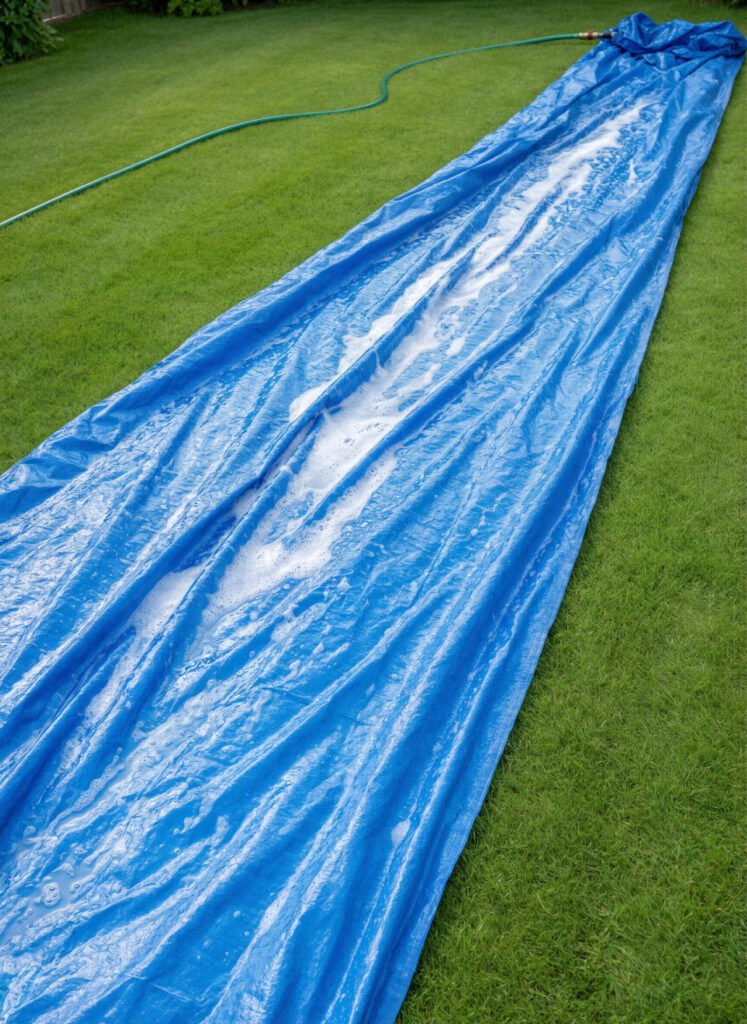
The slip-and-slide is a hallmark of childhood summers, but you do not need to buy a flimsy, easily torn commercial version to have fun. Creating your own heavy-duty version in the backyard is incredibly simple, often safer, and allows you to customize the length and slickness to suit the age of your children.
Materials Needed
-
A large, heavy-duty plastic tarp (minimum 10 feet long)
-
Landscape anchor pins (optional, for securing the corners)
-
A garden hose
-
Tear-free baby shampoo
Step-by-Step Setup
Select a soft, grassy, flat area of your yard. Carefully inspect the ground to ensure there are no hidden rocks, sticks, or sharp objects. Roll out the heavy-duty plastic tarp. To prevent the tarp from moving, you can secure the corners with flat-headed landscape pins, making sure they are pounded completely flush with the ground. Turn on the garden hose and thoroughly wet the surface. For an extra layer of slickness that will not irritate young eyes, squirt a generous amount of tear-free baby shampoo down the center of the tarp.
Developmental Benefits
This activity is pure gross motor exertion. Running, diving, and sliding build core strength, balance, and spatial awareness. It is an incredibly effective way to burn off high energy levels in a safe, controlled environment.
7. Nature Soup
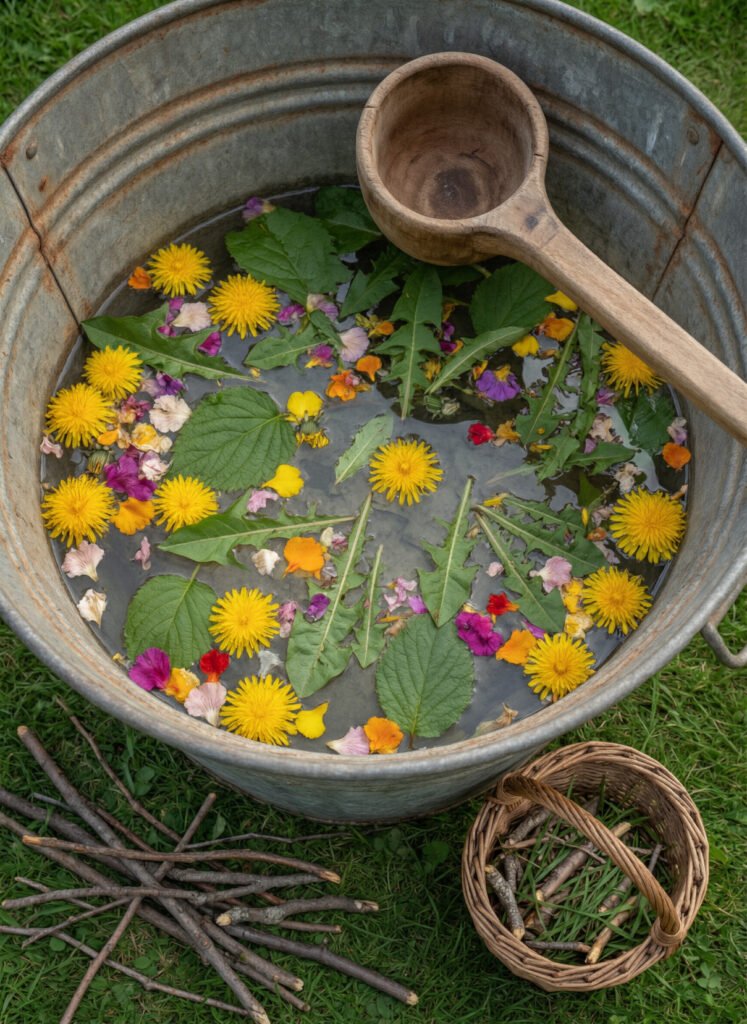
Nature soup is the perfect amalgamation of water play, foraging, and imaginative cooking. It requires zero preparation and encourages children to view their natural surroundings in a creative, interactive way. It is a wonderfully messy, open-ended activity that toddlers and preschoolers adore.
Materials Needed
-
A large, wide bucket or a shallow water table
-
Natural elements (leaves, grass clippings, flower petals, smooth pebbles, twigs)
-
Kitchen utensils (ladles, wooden spoons, plastic whisks, old measuring cups)
Step-by-Step Setup
Fill a large tub with water and place it in the center of the yard. Hand your children a small basket and invite them to forage around the garden for “ingredients.” They can collect fallen leaves, dandelion heads, small twigs, and handfuls of grass. Once they have gathered their materials, dump them into the water bin. Provide them with the kitchen tools and let them stir, mash, and serve up their customized nature soup.
Developmental Benefits
This activity heavily promotes imaginative, dramatic play. Children practice role-playing as chefs, which aids in language development and narrative thinking. The physical acts of stirring heavy water, scooping, and transferring liquids from one container to another refine their hand-eye coordination and spatial reasoning.
8. Water Balloon Piñata
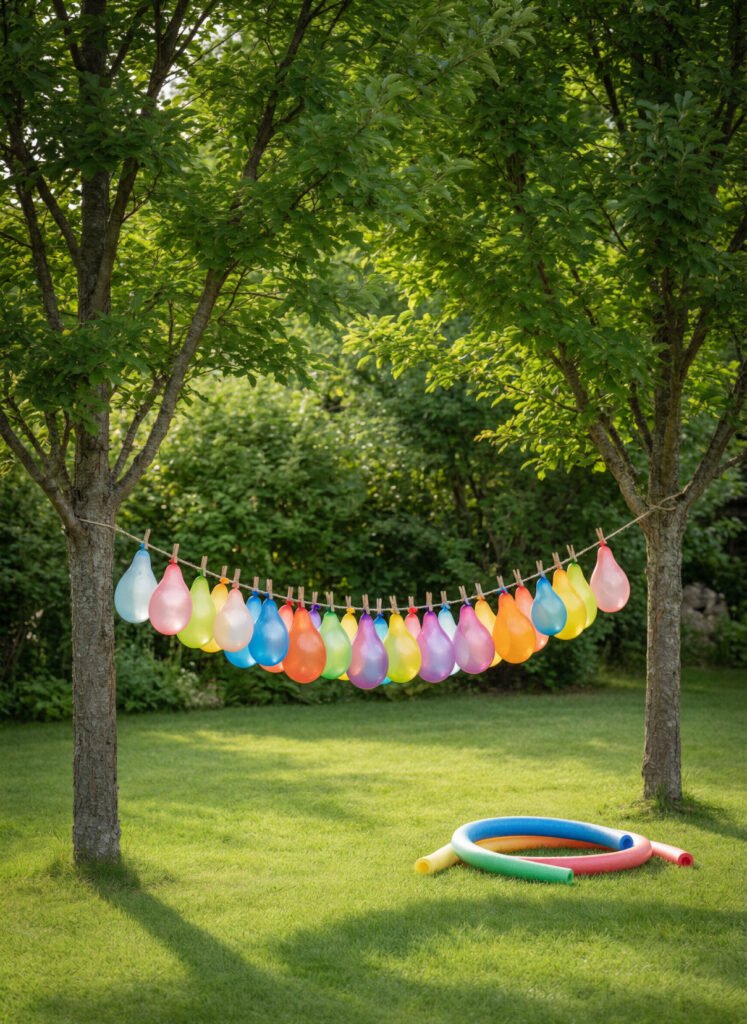
If you want the excitement of water balloons without the rapid-fire chaos of a balloon fight, the water balloon piñata is a brilliant alternative. It confines the mess to one specific area and turns water play into a focused physical challenge that results in a highly rewarding splash.
Materials Needed
-
Standard water balloons
-
A sturdy length of rope or strong clothesline
-
A plastic baseball bat, a lightweight broomstick, or a pool noodle
Step-by-Step Setup
Fill several water balloons with water, tying them off securely. String a sturdy rope between two trees, fence posts, or across a patio structure, ensuring it is at an appropriate height for your child. Tie the filled water balloons to the rope, leaving a few inches of space between each one. Hand your child a plastic bat or a pool noodle and let them take turns swinging at the hanging balloons until they burst and shower them with water.
Developmental Benefits
Swinging a bat at a suspended target is an excellent way to develop hand-eye coordination, timing, and upper-body strength. It requires focus and physical control. Using a softer implement like a pool noodle makes the activity safe and accessible even for children as young as three years old.
9. Sink or Float?
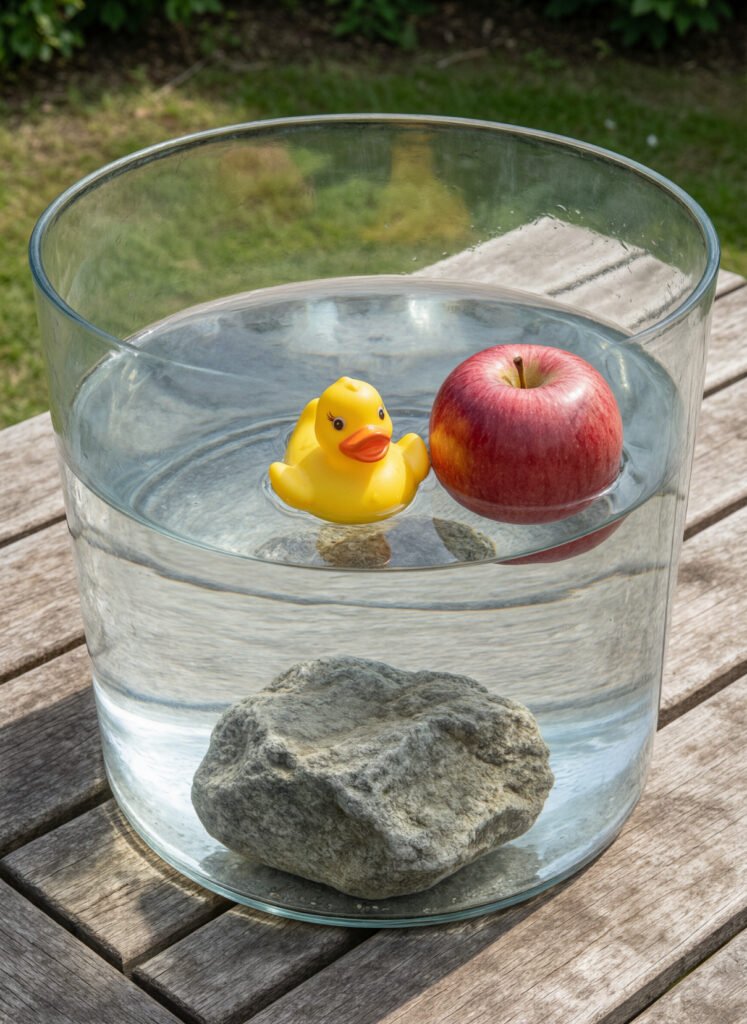
Sometimes the most engaging activities are the simplest ones. “Sink or Float” is a classic early childhood education experiment that can easily be brought to the backyard. It turns a basic bin of water into a floating laboratory, encouraging children to observe the world around them critically.
Materials Needed
-
A large tub of water or a small kiddie pool
-
A collection of varied household and natural objects (e.g., a metal spoon, a plastic toy block, a wooden stick, a heavy rock, a sponge, a rubber duck, an apple)
-
Two small baskets labeled “Sink” and “Float” (optional)
Step-by-Step Setup
Fill your large tub or kiddie pool with water. Gather your collection of items and lay them out on a towel next to the water. Pick up the first item and ask your child a simple question: “Do you think this will sink to the bottom or float on top?” Encourage them to hold the item to feel its weight before making their guess. Let them drop the item into the water to test their hypothesis.
Developmental Benefits
This activity is a fundamental introduction to the scientific method. Children learn to make predictions based on observation (feeling the weight and texture of an object), test their theories, and analyze the results. It teaches early concepts of density and buoyancy in a highly visual, concrete manner that young minds can easily grasp.
10. Giant Ice Excavation Block
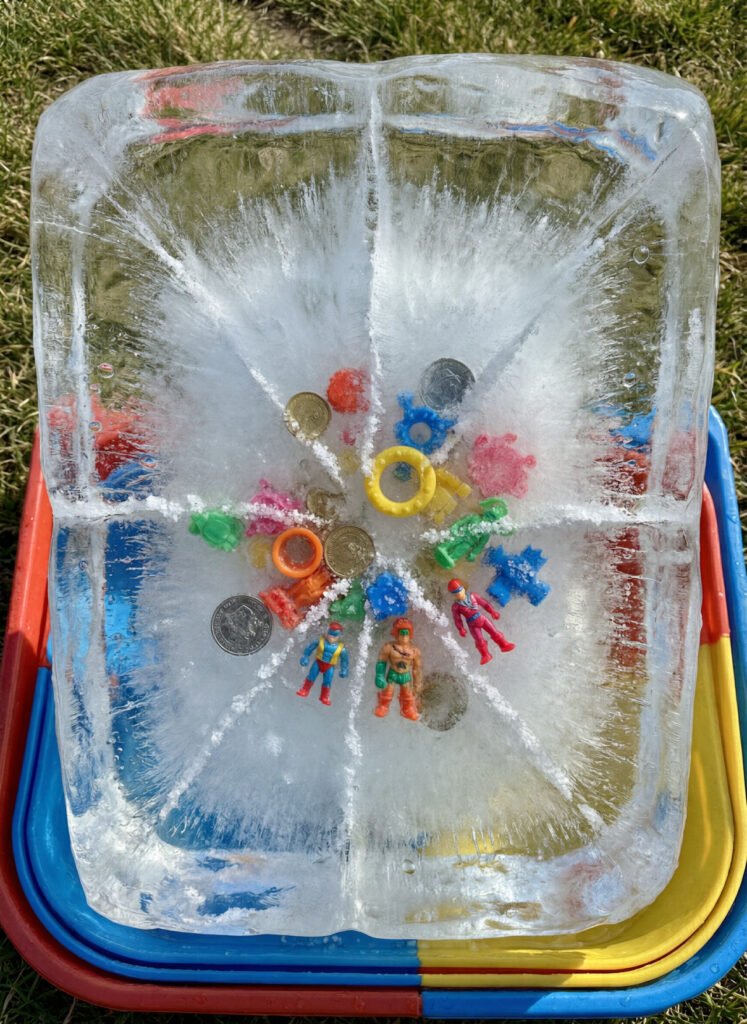
If little ones enjoy small ice cubes, this giant ice block will keep them occupied for hours. In this activity, small toys are frozen together in one large container. It becomes an immersive “archaeological dig” experience for both older children and toddlers, keeping them cool in the summer heat whilst stimulating their curiosity.
Materials Needed
-
A large plastic container or lunchbox (minimum 2-3 litres capacity)
-
Multiple small plastic toys (dinosaurs, coins, rings, action figures)
-
Water and excavation tools (droppers, squeeze bottles, plastic forks, and salt)
Step-by-Step Setup
-
Freeze the water in the large plastic container in layers. First, add a little water and a few toys, then freeze. Next, add more water and more toys on top so that the items are hidden at various depths throughout the block.
-
Once the block is completely frozen solid, remove it from the container and place it on the lawn or inside a large tub.
-
Provide the children with droppers, squeeze bottles (filled with warm water), and a little salt so they can melt the ice and “excavate” their trapped toys.
Developmental Benefits
This activity significantly enhances focus, patience, and problem-solving skills in children. Using droppers and squeeze bottles strengthens their finger muscles, aiding fine motor development. Furthermore, observing how salt rapidly melts the ice serves as an excellent, hands-on introduction to early science concepts such as chemical reactions and freezing points.
11. Colour-Mixing Water Lab
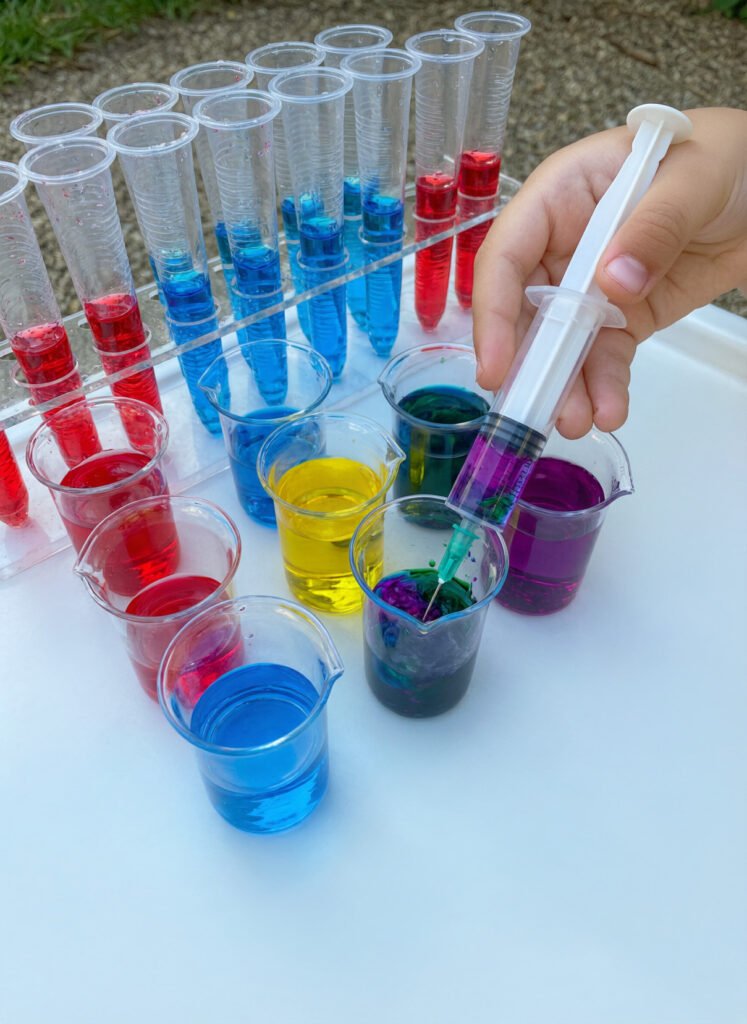
Children absolutely love mixing different elements and playing with colours. The Colour-Mixing Water Lab is an activity that brings out the “mad scientist” in your little ones. This is a completely mess-free, open-ended outdoor activity that provides a brilliant opportunity for visual learning and creativity.
Materials Needed
-
6 to 8 clear plastic cups or glass bottles
-
Safe liquid food colouring (Red, Blue, Yellow – Primary colours)
-
Plastic droppers, syringes (without needles), or small measuring cups
-
A large water table or a plastic mat laid out on the grass
Step-by-Step Setup
-
Fill the clear cups with water and use the food colouring to prepare primary coloured water (some red, some blue, and some yellow).
-
Hand the children a few empty cups alongside the droppers or syringes.
-
Allow them to mix the differently coloured water together—for example, mixing red and yellow to make orange, or blue and yellow to create green.
Developmental Benefits
This lab gives children practical experience with colour theory and cause-and-effect. Transferring water with droppers vastly improves their hand-eye coordination. It also boosts their imaginative thinking, as they often invent creative names like “magic potions” for the new colours they create.
12. Splash Pad Toy Sorting

If you have a small inflatable splash pad or paddling pool in your back garden, you can easily transform it into an educational maze. Splash Pad Toy Sorting is a dynamic, high-energy activity that perfectly combines physical movement with cognitive learning.
Materials Needed
-
A small outdoor splash pad or shallow paddling pool
-
An assortment of waterproof toys (plastic balls, building blocks, magnetic letters)
-
3 to 4 plastic baskets or buckets in different colours
Step-by-Step Setup
-
Fill the splash pad with water and turn on the sprayers. Now, scatter all the plastic balls, blocks, and toys into the water.
-
Place the differently coloured baskets a short distance away from the splash pad (for instance, one red basket and one blue basket).
-
Challenge the children to run through the water spray, pick up one toy at a time, and sort it into the basket that matches its specific colour or shape.
Developmental Benefits
This activity is fantastic for building gross motor skills, agility, and physical stamina. Searching for toys amidst the water sprays and placing them in the correct bucket sharply hones their visual discrimination, pattern recognition, and sorting abilities—all whilst they thoroughly enjoy playing in the warm weather.
Frequently Asked Questions
What should my child wear during outdoor water play?
Comfort and safety are the priorities. Children should wear well-fitting swimsuits or light, breathable clothing that can get dirty. Sun protection is crucial, so long-sleeved UV-protective rash guards are highly recommended. For footwear, water shoes or sandals with secure heel straps are best, as bare feet can easily slip on wet grass or pavement, and they protect against hidden sharp objects in the yard.
How can I ensure water play is safe for children under six?
Constant, undistracted adult supervision is the most critical safety rule for water play; young children can drown silently in as little as one inch of water. Always empty buckets, bins, and kiddie pools immediately after playtime is over. Ensure the play area is free of tripping hazards, and if you are using slip-and-slides, make sure the ground underneath is soft and free of rocks.
How do I prevent mosquito issues when using standing water?
Mosquitoes breed in standing water, so the easiest prevention method is to dump all water bins, kiddie pools, and buckets at the end of the day. Turn the containers upside down so they cannot collect rain or sprinkler water overnight. If you have a permanent water fixture like a small fountain, consider adding child-safe mosquito dunks to the water to prevent larvae growth.
Are water beads safe for toddlers?
Water beads provide an incredible sensory experience, but they are not recommended for children who still put things in their mouths. Swallowing unexpanded or expanded water beads can cause severe medical emergencies, including intestinal blockages. If you have children under three, substitute water beads with a safer alternative, such as tapioca pearls or simply colored ice cubes. Always supervise children of any age closely when water beads are in use.
How can I conserve water while still allowing my kids to play?
Water conservation is a valid concern during the summer. To minimize waste, try using small, shallow storage bins instead of filling up a large kiddie pool. Activities like the sponge bombs, ice cube rescue, and nature soup require very little water to be highly effective. Additionally, you can position your water play activities over a patch of lawn or near a garden bed that needs watering anyway, so the splashed water serves a dual purpose.
Conclusion
Water play is an indispensable part of childhood development, offering endless opportunities for sensory exploration, cognitive growth, and physical exercise. As demonstrated by these nine simple ideas, you do not need expensive toys, vast spaces, or complicated setups to create memorable summer experiences for your children.
From the scientific exploration of a sink-or-float experiment to the energetic thrill of a backyard slip-and-slide, these DIY activities cater to a wide variety of interests and developmental stages. By utilizing everyday household items and a little imagination, you can keep your kids under six entertained, cool, and learning all summer long. Remember to prioritize safety with constant supervision, apply sunscreen generously, and, most importantly, do not be afraid to jump in and get splashed alongside them.